Contents
- 1 Communicator Go Android features & functionalities
- 2 Server side requirements for Communicator Go
- 3 Location and Phone settings
- 4 Communicator contacts
- 5 Using callback feature
- 6 Dialer call status button
- 7 Voicemail management’
- 8 Calling other voicemail boxes directly
- 9 Adding users and contacts to favorites
- 10 Self Care options
- 11 Integration with Android’s dialer
- 12 Changing avatar
- 13 Call transfering
- 14 Technical information about an ongoing call
- 15 Settings
- 16 Signing out / quitting Communicator Go
- 17 Troubleshooting
Communicator Go Android features & functionalities
- Dialing any number or extension with dialer
- Calling anyone from contacts on their extension or any number associated with extension
- Calling anyone from phone’s address book (contacts are loaded and shown in Communicator Go)
- Calling is done using softphone over WiFi and mobile networks (disabled on mobile networks by default)
- Calling using callback if softphone is not registered or disabled
- Voice mail management
- Adding users to favorites for easier access
- Integration with Android for easier dialing from other apps
- Self Care options
- Password reset and changing
- QR Code scanning for easier first-time setup
Server side requirements for Communicator Go
- PBXware has to be version 4.0 at least
- TCP has to be enabled system-wide. To make sure you have TCP enabled, in your PBXware GUI navigate to Settings -> Protocols -> SIP (tab) > TCP settings
- Format of voice messages has to be wav.
- SSL/TLS certificate must support SHA2.
Logging in
Communicator Go requires email address and password for login. Additionally, server address may be needed if cannot be found by resolving DNS record based on the email address.
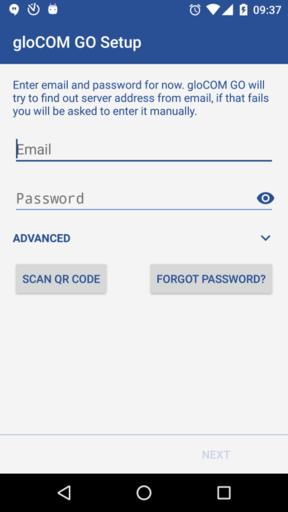
- Enter email address associated with your extension. This is used as username for Communicator Go login.
- Password
- To authenticate Communicator Go with your PBXware server you will also need to provide user password generated on your extension.
- SCAN QR CODE
- This button opens a camera preview for QR code scanning.
- FORGOT PASSWORD
- By clicking this button you will open a confirmation dialog for password resetting. Email and optionally server address fields need to be filled out before attempting password reset.
In case you have your own DNS server PBXware allows you to create DNSsrv record in order to make login to Communicator clients simple and fast.
In case this is not set up or if DNS resolution fails you will see notification DNS resolution failed.
Logging in using QR code
It is possible to login in Communicator Go using specially created QR code. This is often used and helpful when you log in with Communicator Go for the first time.
When administrator creates your extension, you will be assigned a long, automatically generated user password on your email and typing it into Communicator Go can be error prone. In this case you can simply scan the QR code, you got in the email with your password, using SCAN QR CODE button and Communicator Go will fill out necessary fields.
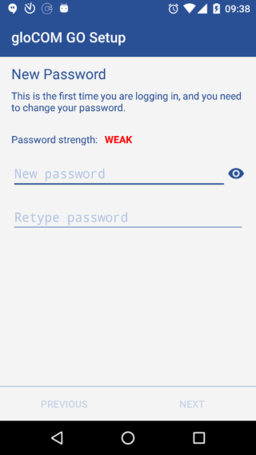
Setting new password after logging in for the first time
When you log in Communicator Go for the first time, you will be asked to change your password. You will have to enter new password and retype it in order to confirm it. In case you make a mistake so password entries do not match or in case password is not strong enough, NEXT button will stay disabled. Once your password match our strength criteria you will be able to log in.
Location and Phone settings
Clicking on country name opens screen with countries to choose from.

- DETECT
- DETECT button tries to detect your country automatically. This works if you have Location Services enabled in your system’s settings. Information about your country is needed if you need to use E.164 numbers format when dialing phone numbers from your phone book.
- SIM NUMBER
- This field contains your automatically detect SIM number. If number could not be read from SIM card filed is empty and you can type your number manually. SIM number is crucial for callback feature.
- PHONE NUMBERS
- This section contain numbers defined with your extension. You can add more numbers using ADD NEW NUMBER button and sort them by priority using the drag handle on the right of number and label. These numbers appear in a list of numbers associated with your extension when someone tries to call you from Communicator Go or desktop Communicator.
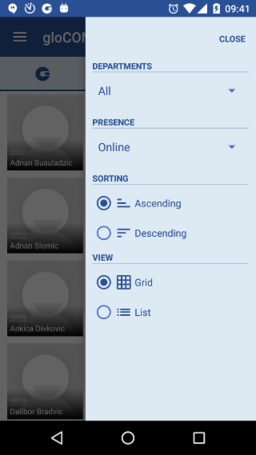
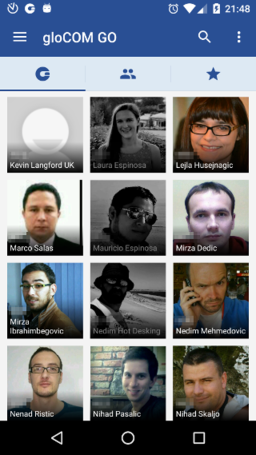
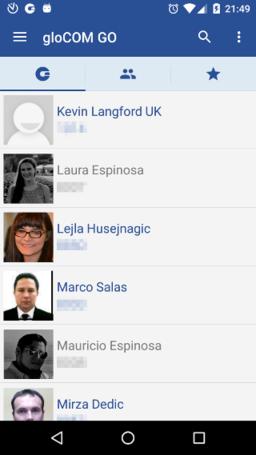
Communicator contacts
First screen that is shown when Communicator Go launches shows users from your organisation. Users can be sorted according to presence and department.
Clicking on a user brings up user’s details screen from which you are able to see user information and performe different actions.
Additional phone numbers that user associated with their extension will be listed as well.
Quick double tap on user initiates a call.
Using callback feature
Callback is useful when softphone cannot be registered due to some error, or when poor network quality impacts call quality.
Simply, when using callback, Communicator Go tells server to call your mobile number via regular GSM network and you will receive a GSM call.
When starting Communicator Go for the first time you will see tip about callback as below.
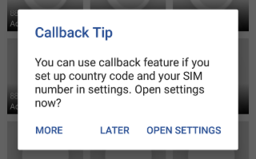
- MORE
- By pressing this button additional information about callback functionality will be displayed.
- LATER
- Press this button to dismiss Callback Tip dialog.
- OPEN SETTINGS
- OPEN SETTINGS button opens Location and Phone settings screen.
When callback settings are in place you have option to use callback for all outgoing calls in Settings -> General -> Callback usage.
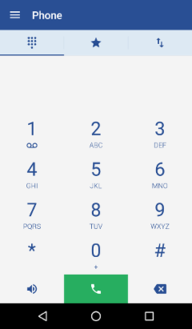
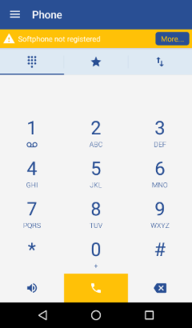
Dialer call status button
Call button in dialer screen has three states depending on softphone registration status and connectivity status.
If softphone is not registered and button is yellow, calls still can be made if callback option is configured.

Voicemail management’
With Communicator Go you can listen to new and archived voice messages, archive and delete one or many messages. You can also call other users’ voicemail directly.
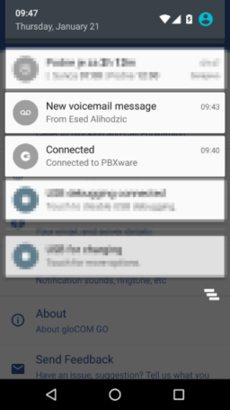
Notifications are shown for new voice messages as shown below.
Playing voice messages
Messages can be played by opening the message itself and then playing it or by played in preview mode by clicking play button from the messages list.
If the message is not downloaded when play is clicked, progress dialog will be shown and once download is done message should start playing.
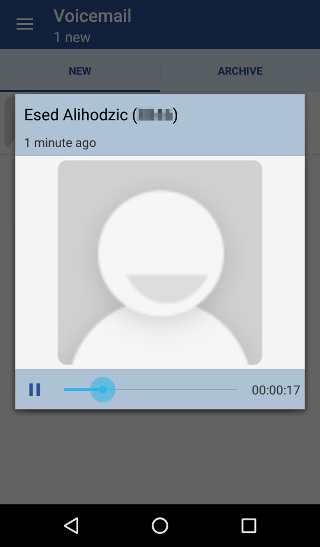
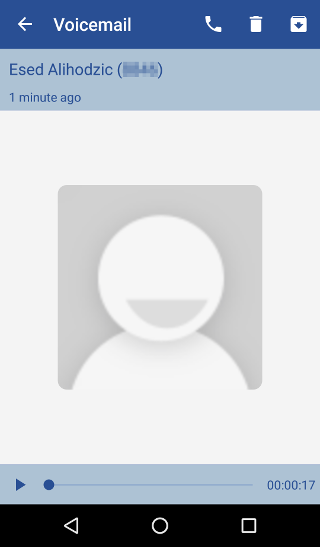
When playing messages in separate screen you can swipe left or right to switch between messages.
Deleting and archiving voice messages
You can delete or archive individual messages by clicking on them and then clicking delete icon () or archive icon () in toolbar.
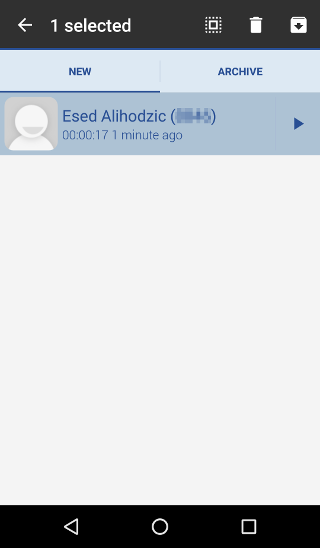
You can also select more messages and delete or archive them together by long clicking a message from the list and then clicking delete icon or archive icon in toolbar.
Select all icon () selects/deselects all messages in the list.
Delete icon deletes selected messages.
Archive icon archives selected messages.
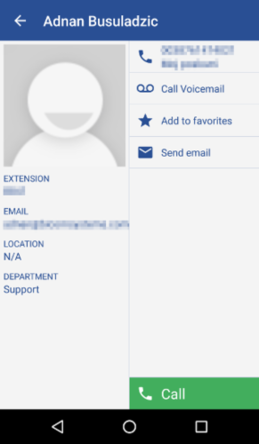
Calling other voicemail boxes directly
In case you would like to leave a voicemail directly, dial *125EXT_No where EXT_No is extension number of a contact, alternatively or you could open user’s details screen and click Call voicemail as shown below.

Click Call Voicemail to leave a voicemail message to contact.
Add to favorites adds user to your favorites list.
Adding users and contacts to favorites
You can add other users and contacts from phone book to favorites to have them in one place and have them show up first while performing an action, e.g. transferring a call.
Users can be added/removed from favorites by clicking Add to favorites or Remove from favorites on user’s details screen as shown in above.
Contacts from phone book can be added or removed from your favorites by clicking on it and choosing Add to favorites or Remove from favorites, as shown below.
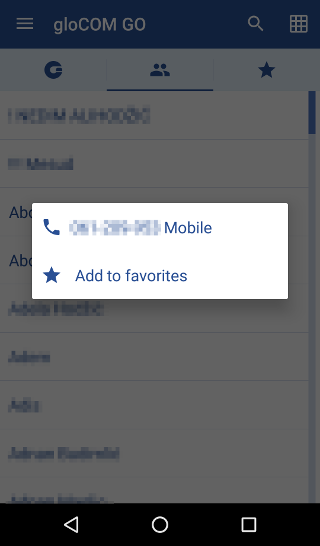
Add to favorites adds contact to favorites
Self Care options
Self Care options in settings include options to block your caller ID, enable unconditional call forwarding and to specify the number to forward calls to.
If the number to forward calls to is not specified, calls will be forwarded to voicemail.
Note that self care options are available if they are enabled on server side.
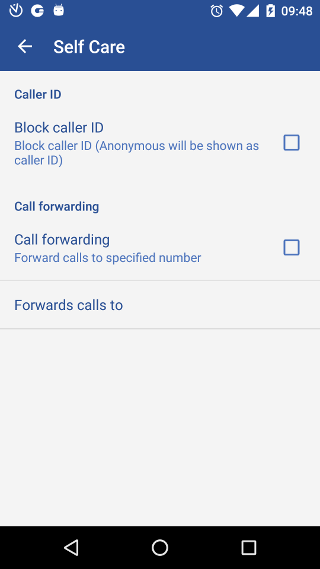
If Block caller ID option is checked, “Anonymous” will be in place of your caller ID.
If Call forwarding option is checked, all incoming calls will be forwarded to number specified under Forward calls to option.
Forward calls to option opens a dialog for entering a number to forward calls to.
Integration with Android’s dialer
Communicator Go can integrate with Android’s dialer and show itself as an option in system’s “Complete action with…” dialog when a call is about to be made. This option is turned off by default and you can enable it in Settings > General > Integrate with system’s dialer.
If there are no other apps on system that use dialer integration, Android will launch Communicator Go, when new call is about to be made, without asking you.
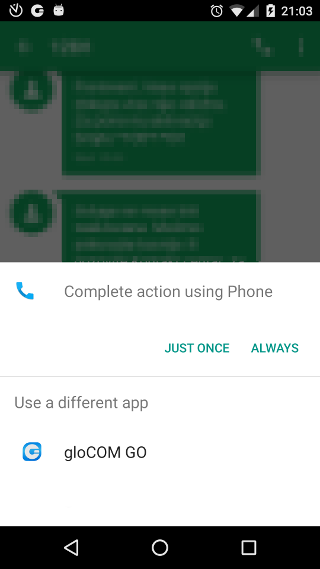
If dialer integration is enabled in Communicator Go, you will have option to complete outgoing calls using Communicator Go.
Changing avatar
You can change your avatar by opening main drawer menu and clicking avatar icon above your name and extension, as shown below.
Click on avatar icon brings options for changing avatar image. After taking picture with camera or choosing one from gallery you will have to crop your image.
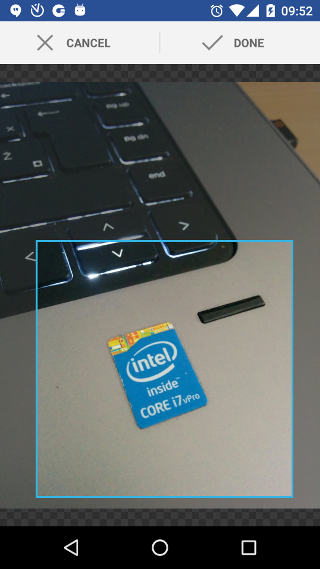
Click and hold inside blue rectangle to move it.
- Click and hold blue edges to resize.
- DONE
- Done button finishes cropping and sets avatar.
- CANCEL
- Cancel button cancels cropping.
Call transfering
You can transfer a call by clicking transfer icon from call options menu. Popup dialog shows with transfer options.
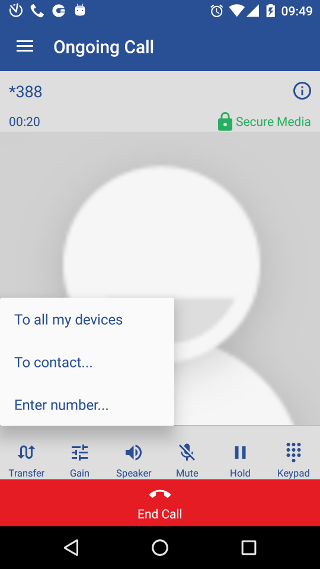
- To all my devices
- To all my devices transfers call to all devices that are registered with your extension. They all ring and you can continue call on any of them.
- To contact…
- Pressing To contact… brings up a screen with favorites, users and phone book contacts to choose someone to transfer call to.
- Enter number… option shows popup dialog with text field for number to transfer call to.
Technical information about an ongoing call
While in call, you can show technical information about it by clicking info icon (). This can be useful for diagnosing problems with call quality.
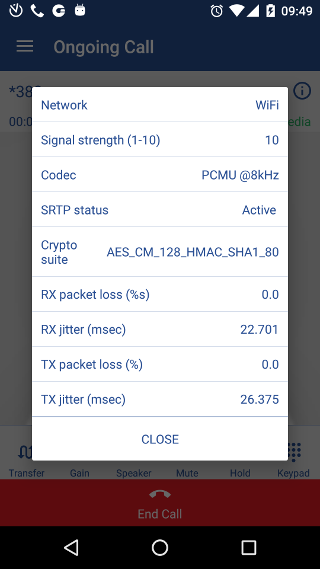
High packet loss and high jitter, both RX and TX indicate that call quality suffers due to network quality and usage.
RX stands for reception (incoming traffic) and TX for transmission (outgoing traffic).
Settings
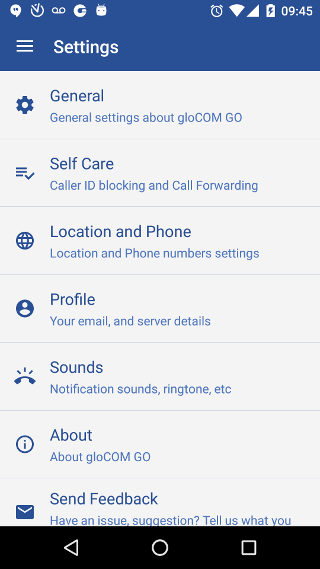
- General
- General option shows screen with general settings for Communicator Go.
- Self Care
- Selecting Self Cares will show screen with blocking caller ID and call forwarding options.
- Location and Phone
- Shows screen with settings for Country, SIM number, and phone numbers associated with your account.
- Profile
- Profile shows details about your account.
- Sounds
- Contains option to choose ringing tone for incoming calls.
- About Communicator Go
- Displays about page.
- Send Feedback
- Send Feedback option launches email client with “To” and “Subject” fields pre populated for sending feedback.
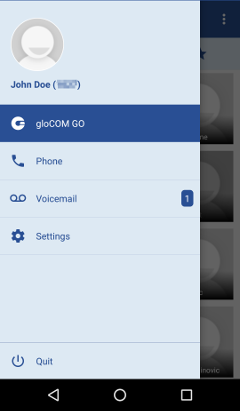
Signing out / quitting Communicator Go
There are two ways to quit Communicator Go when you click Quit from main drawer menu.
You can Sign Out, which will clear your profile data and you will be asked to provide password next time you start Communicator Go.
Or you can just Quit application. This exits Communicator Go leaving all your profile data and settings untouched. Next time you start Communicator Go you won’t be asked for password.
Troubleshooting
I’m logged in but I’m not shown as online on desktop Communicator
When user is signed in via Communicator Go he will not appear in desktop Communicator as online unless “Online on IM or phone” option is selected in desktop Communicator settings for contacts.
Calls don’t work over mobile data network
If calls don’t work over mobile data and TLS is not enabled then TCP should be enabled for extension and Force TCP option should be checked in Communicator Settings -> General.
If calls fail over mobile networks with force TCP connection option checked then the option should be unchecked and TLS transport should be allowed for extension in PBXware.
Calling a contact from phone book fails
Try disabling E.164 numbers formatting in Settings -> General.
Calls work, but in-call controls (hangup, hold, transfer) don’t work
If calls can be made but in-call options (hold, transfer, hangup) aren’t working and PBXware is behind NAT with non-default ports for TCP and external IP specified make sure that External TCP port is specified as well. Log in to your PBXware and navigate to-> Settings -> Protocols -> SIP (tab) -> NAT (section) -> External TCP port.